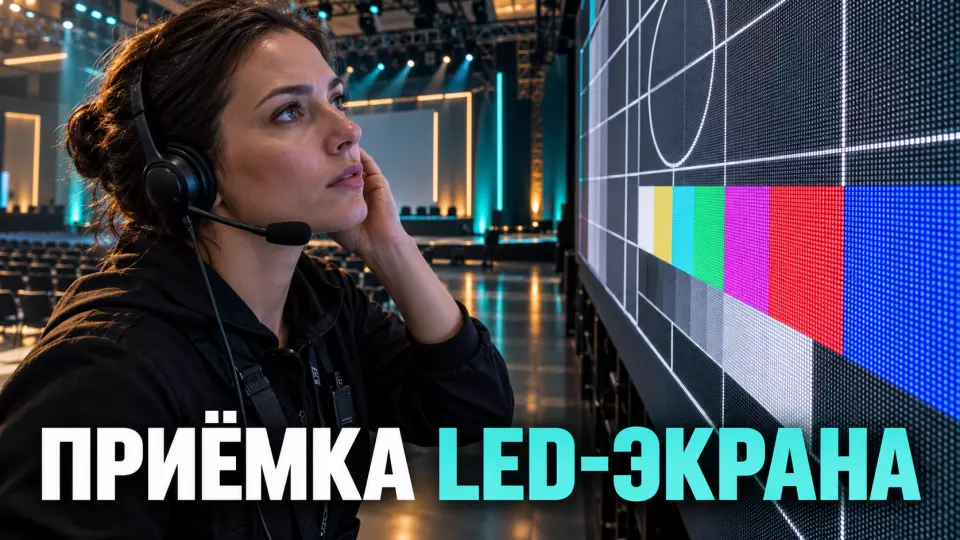
How to check the panel, signal, cameras, working content and LED screen backup, log defects and sign off the system before the doors open.
The screen is assembled, the image has appeared, the contractor reports it is ready. But one section of the light-emitting diode (LED) screen looks darker than its neighbours. Under working light, small text is lost, and the camera sees banding. If the system is accepted on the basis that it “switches on”, these defects will carry over into the full rehearsal and take time away from other departments.
At Aventura, we treat LED screen acceptance as a separate mandatory stage before the rehearsal. We check the assembled display system: the panel, the working source, the content, the cameras and the backup. The team records the final status and all open limitations.
If a screen is part of your project, request a quote for organising and technically delivering the event. We will link the screen system to the scenario, lighting, filming, content and the overall venue plan.
What counts as LED screen acceptance?
LED screen acceptance at an event is a check of the actual result after installation and initial setup, but before the system is cleared for the main program. The team evaluates the assembled screen together with the working source, content and cameras. The outcome of the check answers a specific question: can the system deliver the declared scenario for the room and for filming under real event conditions.
This is not engineering certification and not a repair manual. Structural calculations, power, controller setup and module replacement are handled by specialist engineers. The client or production manager accepts the observable result and records which limitations remain.
Acceptance starts with an already assembled configuration. The choice of model, pixel pitch, mounting method and suspension point must be closed out earlier. These matters belong to the technical site audit and design. At the current stage, the team checks whether the installed result matches the agreed technical specification.
The phrase "the screen works" is too broad. An individual section may differ in brightness, while the active image area may crop the edge of a presentation.
A backup input sometimes exists only on the diagram. Meanwhile, cameras can reveal an artifact that the operator at the wall cannot see. Each result requires a separate test.
We consider a screen ready for the next stage when the team can show four things: a verified configuration, test results, a list of defects and one final status. If an important part of the system changes, the affected check is carried out again.
Input Data and Acceptance Roles
Before testing begins, you need a working configuration, clear criteria and one person who is responsible for the final status. The team collects documents, files and settings for verification in advance. Otherwise, specialists may diligently test different versions of the system, get different results and spend installation time clarifying the initial conditions.
The package includes a screen diagram, an equipment list, the parameters of the image working area, the main signal source and the approved content version. Lighting scenes, camera positions, venue rules and the criteria from the contract or technical specification are recorded separately. Universal tolerances for brightness, the number of defective pixels or recovery time are not added here. They depend on the specific project and equipment.
Roles are best named before the first pattern. One specialist operates the processor, another is responsible for the media server — the content playback system. A third monitors the cameras, a fourth changes the lighting. One person is responsible for the final status.
The table summarises the key points of the section: Role, What they confirm, What they pass on to the status owner. Use it as a quick reference when preparing the event.
| Role | What they confirm | What they pass on to the status owner |
|---|---|---|
| LED system contractor | screen assembly, connection, settings and correction of hardware defects | the actual configuration and the result of their tests |
| Video engineer | inputs, image working area, scaling, saved setting presets and the signal path | which route has been checked and where a limitation remains |
| Content team | master versions of files, first and last frame, formats | which file and which version are running |
| Lighting department | working lighting states of the stage and hall | under which conditions readability and contrast were checked |
| Camera team | the result in the viewfinder, the reference recording and the broadcast chain | which artefacts each working camera sees |
| Venue or technical client | local regulations, access and site restrictions | what is closed off under the venue rules |
| Acceptance owner | the overall criterion, defect list and decision | status for the director, the command centre and the technical rehearsal |
For projects where the screen is part of a large stage, it is useful to link acceptance in advance with the LED screens service and the overall technical plan. The link between tasks matters more than the contractor's name: the screen, lighting, camera and display system should be checked as one working environment.
How to inspect the screen before content launch?
First, the screen is inspected as a physically assembled wall, without trying to hide flaws behind a polished video. The team checks the geometry, seams and evenness of the LED screen sections. At the same time, qualified specialists confirm safe access and compliance with venue rules. This step should separate an observed defect from an assumption about its cause.
The inspection is carried out in a safe operating state set by the technical lead. The client does not open screen sections or interfere with the power supply. They look at the result and point out the area where the problem appears.
We check:
- whether the image fully occupies the agreed screen area;
- whether there is cropping, stretching or an unexpected empty area;
- whether the physical layout of sections matches the logical map;
- whether vertical and horizontal seams stand out;
- whether any section or module has noticeably different brightness or hue;
- whether spots, unstable pixels or a repeating defect pattern are visible;
- whether any parts of the structure protrude into the guest or stage area;
- whether access to the back of the wall and service areas is preserved;
- whether cable routes are protected and do not obstruct walkways;
- whether the designated emergency shutdown is available to the authorized team.
The observation is recorded without a diagnosis if the cause has not yet been established. The wording "dark rectangular spot in the upper right part on a grey fill" is more useful than "calibration is broken". The first phrase allows the test to be repeated. The second may send specialists down the wrong path.
After replacing a module or section, the inspection does not end with the picture appearing. Official manufacturer materials show that some systems require a standard procedure to restore calibration data. Therefore, the replaced area again goes through fills, seam checks, working content and post-restart monitoring.
Patterns and real content
Test images help find technical defects, while real content shows their impact on the show. That is why acceptance runs in two steps: first the team uses diagnostic fills, grids and motion, then runs the approved event materials along the working signal path. These layers complement each other and answer different questions.
Solid fills help reveal unstable pixels, blotches and differences between modules. Grids and lines show geometry, cropping and incorrect scaling. A gradient detects banding and crushed shadows. A moving pattern helps spot stutters, tearing, duplicates or incorrect section layout.
The set of patterns depends on the processor and the project. Brompton and NovaStar documentation confirms the principle of diagnostic images itself, but does not give the right to declare the same menu mandatory for any hardware. The technical specialist chooses the available tools and explains which defect each test checks.
After diagnostics, the event's master content is run. We use the same source, input, saved settings set and launch method that will be used during the show. A test laptop connected directly next to the wall does not confirm the working signal path from the control room.
The check set usually includes:
- title card and brand colours;
- a presentation with the smallest text and thin lines;
- faces and skin tones;
- light and dark scenes;
- a clip with fast motion;
- the first and last frame of every important file;
- an emergency backup slide;
- a camera signal, if it is routed back to the screen;
- materials in different formats that are declared in the programme.
The master version must be locked in earlier. The file workflow is covered in detail in the article on freezing presentations before a conference. Screen acceptance does not decide which file is final. It proves that the approved file runs correctly through the working playback system.
Intros and transitions with rapid flashes are reviewed separately. The World Wide Web Consortium (W3C) describes the risk of such content and advises evaluating it at the maximum display scale. This material does not become a Russian standard for the event, but it gives a useful signal: a dangerous fragment cannot be assessed only in a small window of the editing software.
What will the audience and cameras see?
The final image is checked from representative points in the room and through every working camera. The operator evaluates the image under the lighting scenes, angles and shooting modes that will be part of the program. The central view from the control room does not show what the back row, the speaker on stage or a lens with a different shutter speed will see.
Viewing points are chosen based on the actual layout. Typically, you need the center of the guest area, the edges of the room, the nearest workstation, the farthest point, the speaker's position and seats at a wide angle to the screen. A universal distance cannot be assigned. It depends on the geometry, image size, pixel pitch and what the viewer needs to do.
The check is repeated under the lighting conditions that will actually occur in the program. The professional association AVIXA treats contrast as a property of the entire system and environment. The International Telecommunication Union (ITU) also links image perception to viewing conditions. Therefore, a result in an empty dark room does not prove readability under working stage lighting.
For each condition, brightness is not the only thing examined. Readability of small text, distinguishability of dark details, glare, visual comfort and the behavior of brand colors are all checked. Maximum brightness is not a goal in itself. It can tire the audience, degrade dark scenes or create a problem for the camera.
The camera check is performed on the actual event setup. The operator looks at the viewfinder, the reference monitor and a short recording. Bands, tearing and other artifacts in the camera frame may depend on the LED panel, the processor and the synchronization of the signal path. Therefore, the result is checked on the actual set of cameras and the screen, not by a single specification parameter.
If the problem appears in only one camera, it is recorded as a reproduction condition. Then the relevant specialists change one variable at a time and repeat the shot. Simultaneously changing brightness, settings, shutter speed and content does not show what actually helped.
We discuss technical preparation in the Aventura Telegram channel. The statuses of a specific project, diagrams and camera results remain within the team's closed loop.
Signal path and redundancy
The system is accepted along the entire signal path: from the working computer or media server to the LED screen. Redundancy is confirmed only by an actual switchover. A second cable, computer or controller by itself proves nothing. The team must set up a backup route in advance, load current content onto it and make sure the operator knows the procedure.
First, the team names the primary route. The record includes the source, the active input and the resolution of the image workspace. It also captures the selected set of settings, the launch method and the responsible operator. Then the same content passes through all the declared sources: the presentation computer, media server, video mixer, camera or remote feed, if they are part of the programme.
The redundancy check follows a pre-agreed switchover scenario in case the primary source fails:
- Name the primary and backup source, as well as the person responsible for the switchover.
- Make sure the backup holds the current version of the content.
- Run a recognisable fragment of the working material on the primary route.
- Perform the switchover specified by the project.
- Confirm the image in the hall and on the working cameras.
- Return to the primary route and check that the configuration has been restored.
- Record the result, the limitation and the team's action during the programme.
Recovery time should not be taken from someone else's project or a promotional description. It becomes a criterion only when it is written into the technical specification, risk plan or contract. In all other cases, the team records the actual result and decides whether it suits the declared scenario.
This block is linked to the overall technical rehearsal of the event, but does not replace it. Acceptance confirms the screen and display system. The rehearsal checks how the system interacts with lighting, sound, stage entrances, the host and the entire programme.
For a complex project, the screen is part of the overall technical equipment for the event. At the same time, the specific redundancy scheme is determined by the technical director. This article does not replace engineering design and does not disclose the venue's internal routes.
How to keep a defect list and run retests?
Every issue should let another specialist reproduce the problem and understand the closure criterion. To make that possible, the team records the defect location, display conditions, symptom, owner and the method of checking after the fix. Phrases like "something is flickering" or "the colour is off" lead to arguments. A precise ticket turns an observation into a verifiable task.
A defect ticket includes the area of the canvas, the test material, the viewing point or camera, the lighting state, the symptom, the severity, the owner, the deadline and the retest method. For an image, it helps to attach a photo or a short recording, as long as they do not distort the defect itself. Evidence supplements the description rather than replacing it.
The table summarises the key points of this section: Field, Example of a neutral entry. Use it as a quick reference when preparing an event.
| Field | Example of a neutral entry |
|---|---|
| Where | upper right area of the canvas, specific section per the contractor's map |
| Visible on | grey fill and title screen |
| Viewed from | centre of the guest area and the first working camera |
| Condition | working lighting scene of the performance |
| Symptom | area is darker than the neighbouring ones, the edge is noticeable on a face |
| Owner | the role or department that fixes the root cause |
| Closure criterion | repeat of the same fill, title screen and camera shot with no noticeable transition under the agreed conditions |
| Status | open, fixed and awaiting test, closed, accepted with a limitation |
The cause is recorded separately from the observation. The same visible break may be related to the content, signal processing, network, a specific section or the layout of the image working area. The diagnosis is made by the relevant specialist. The acceptance owner makes sure that the original test is repeated after the change.
The closure rule is simple: a message saying "fixed" moves the task to the awaiting-test state but does not close it. The team restores the same conditions, runs the same material and looks from the same point. If the change has affected neighbouring areas or the entire signal path, the technical lead expands the scope of the retest.
After acceptance, any significant change returns the affected part to testing. This applies to a new file, a different input, a new set of settings, a module replacement, a camera move and a change to the lighting scene. The full process does not always need to start over, but the impact of a change cannot be taken on trust.
How to choose the final acceptance status?
The acceptance outcome is communicated through one of three statuses: accepted, accepted with an explicitly recorded limitation, or not accepted for the declared scenario. The choice depends on the results of the mandatory tests and the impact of open defects on the programme. These are the team's working statuses, not legal wording for a report or a universal industry standard.
The table summarises the key points of this section: Status, When to apply, What the director or the command centre gets. Use it as a quick reference when preparing an event.
| Status | When to apply | What the director or the command centre gets |
|---|---|---|
| Accepted | mandatory tests passed, no blocking defects, the backup has been checked to the agreed extent | the screen and display system is ready for the next stage |
| Accepted with a limitation | a defect remains, but the authorised parties understand its impact and have agreed on an acceptable scenario | the exact limitation, the affected content and the fallback action |
| Not accepted for the declared scenario | the defect blocks safety, the main display, the agreed shot or the working backup | what blocks the transition, who owns it and when the retest will take place |
The status "accepted with a limitation" must not be used as a catch-all for inconvenient remarks. The limitation must be observable. For example, a specific video is excluded from the programme, one source is not used, or a camera changes the agreed angle. The wording "there are some minor issues" tells the next shift nothing.
The status "not accepted" does not mean that the entire project is stopped forever. It shows that the declared scenario has not yet been proven. The team can fix the defect, simplify the display method, switch to a tested backup or change the programme. Once resolved, the affected tests are run again.
A blocking remark is passed along the established route. In the article about the event command centre and radio communication we cover the general escalation format. For the screen, a short message is enough: the observed fact, the affected scenario, the owner, the action and the time of the next confirmation.
Handing the screen over to the technical rehearsal
The screen is handed over to the full rehearsal after a short status briefing to the team. It lists the verified configuration, open limitations and the person responsible for backup switching. The wider team does not need the entire discussion log. What matters to them is understanding what is ready, what is limited and which change would require the system to be re-tested.
The handover process looks like this:
- Record the actual configuration and the working content versions.
- Confirm the results for the canvas, patterns, guest access points and cameras.
- List the closed defects and attach the re-test results.
- Separately name the open limitations and their impact on the programme.
- Confirm the primary signal route and the verified backup.
- Name the switching owner and the owner of the final status.
- Hand over a single status to the director, the production manager and the command centre.
- Return the affected block for re-checking after any change.
Final check before doors open
Before the doors open, the team runs a short final check on the working configuration. It confirms that the screen is showing the approved content, the cameras are capturing the verified frame, the backup switches over, and every open defect has an owner and a status. This is the last snapshot of the system before the main programme begins.
We check:
- the image working area is filled correctly;
- seams and unevenness have been assessed on diagnostic material;
- the approved content has been launched from the primary system;
- the lighting scenes have been checked;
- every camera has produced a reference frame;
- the backup has been switched by an actual action;
- defects have owners and statuses;
- access and security have been confirmed by the relevant specialists in line with the venue's rules.
Acceptance does not promise that there will be no failures during the event. It removes the uncertainty the team can find before the guests arrive: an untested input, a verbally reported defect, an old file version or a backup in name only. At Aventura we run this stage so that the full rehearsal starts from a known configuration rather than from re-assembly under time pressure.
If you need to link an LED screen with the script, lighting, cameras and the work of the technical services, request an event quote. We will put together the acceptance criteria, roles, re-tests and the handover of the system to the full run-through.
The functions of specific manufacturers relate only to the systems mentioned and are not declared as universal requirements.
Frequently Asked Questions
LED screen acceptance at an event is a check of the actual result after installation and initial setup, but before the system is cleared for the main program. The team evaluates the assembled screen together with the working source, content and cameras. The outcome of the check answers a specific question: can the system deliver the declared scenario for the room and for filming under real event conditions.
Before testing begins, you need a working configuration, clear criteria and one person responsible for the final status. The team collects the documents, files and settings for the check in advance. Otherwise, specialists may diligently test different versions of the system, get different results and spend installation time clarifying the initial conditions.
First, the screen surface is inspected as a physically assembled wall, without trying to hide flaws behind a beautiful video. The team checks the geometry, the seams and the evenness of the LED screen sections. At the same time, the relevant specialists confirm safe access and compliance with the venue rules. This step should separate an observed defect from an assumption about its cause.
Test images help identify a technical defect, while real content shows its impact on the program. That is why acceptance takes place in two steps: first the team uses diagnostic fills, grids and motion, then runs the approved event materials along the working route. These layers complement each other and answer different questions.
The final image is checked from characteristic points in the room and through all working cameras. The operator evaluates the image in the lighting scenes, angles and shooting modes that will be part of the program. A central view from the control room does not show what the back row, the speaker on stage or a lens with a different shutter speed will see.
The system is accepted along the entire signal path: from the working computer or media server to the LED screen. A backup is confirmed only by an actual switchover. A second cable, computer or controller by itself proves nothing. The team must configure the backup route in advance, load current content onto it and make sure the operator knows the procedure.
Sources
- AVIXA: system contrast of the image
- Brompton Technology: processor test patterns
- Brompton Technology: panel alignment
- Brompton Technology: eliminating artifacts in the camera frame
- NovaStar: controller manual and redundancy
- ITU: methodology for subjective image assessment
- W3C WAI: rapidly flashing content
- ROE Visual: calibration after module replacement
Contents
Was this article helpful?